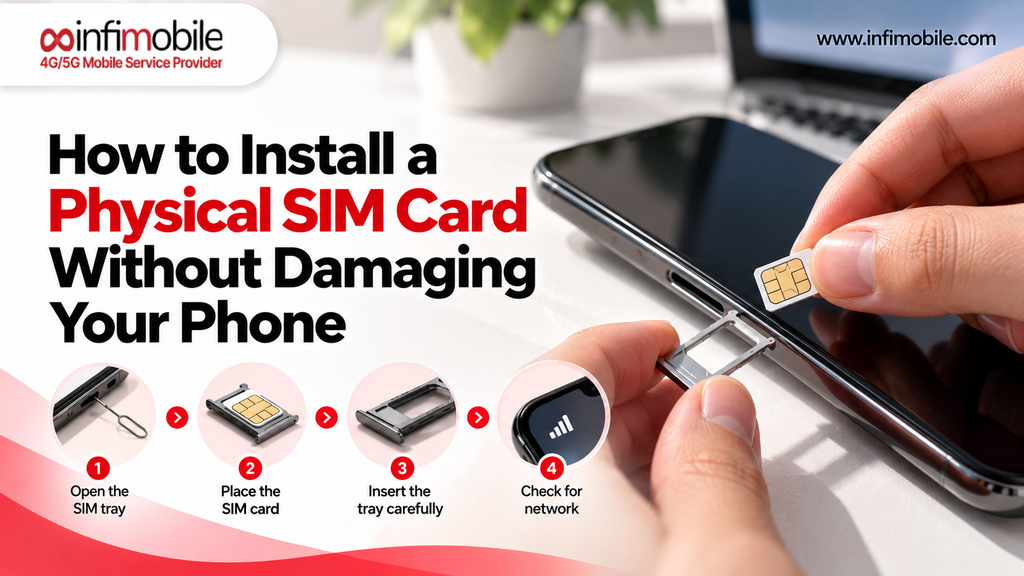
Installing a SIM card takes about a minute, but it’s one of those small jobs where a rushed move can cause real trouble: a bent tray, a scratched card, a snapped paperclip, or a phone that suddenly says “No SIM.” The good news is that nearly every problem is avoidable if you know what to check first and which steps to take slowly.
This guide walks you through the whole process: confirming your phone actually has a SIM tray, choosing the right size from a 3-in-1 SIM kit, opening the tray safely, seating the card correctly, and finishing activation. You’ll also find a list of common mistakes to avoid and a troubleshooting section for when something doesn’t work.
Table of Contents
- Check-phone
- Sim-kit
- What You’ll Need
- Steps
- How to Avoid Damaging Your Phone
- Notes for iPhone and Android
- Activating Your Infimobile SIM
- Troubleshooting
- Physical SIM or eSIM?
- Faqs
Step 1: Check That Your Phone Takes a Physical SIM
Before you open anything, make sure your phone has a SIM tray at all. This matters more than it used to.
iPhones. Apple states that iPhone 14 models and later purchased in the United States can only be activated with an eSIM, and that some newer iPhone 17 models have no physical SIM tray either. The iPhone Air is eSIM-only worldwide. If your iPhone has no tray, you can’t use a physical SIM, and you should set up an eSIM instead. Models bought in many other countries and older iPhones do have a tray.
Android phones. Most Android phones still include a physical SIM tray, usually on the side or top edge, and many also support eSIM. Some models use a combined tray that holds a second SIM or a memory card.
Next, confirm two more things:
- Your phone is unlocked. A phone locked to another carrier can’t activate on a new network.
- Your phone is compatible. Infimobile asks that phones support 5G or 4G LTE and VoLTE. Dial *#06# to find your IMEI number, then check it with the compatibility checker at infimobile.com/compatible.
Understand Your 3-in-1 SIM Kit.
Infimobile ships a 3-in-1 SIM card kit. It’s one plastic card that contains standard, micro, and nano SIM sizes, each outlined so you can press out the size your phone needs. That way, you don’t have to know your phone’s SIM size ahead of time.
| Standard (mini) | 25 mm × 15 mm | Older phones |
| Micro | 15 mm × 12 mm | Phones from the early smartphone era |
| Nano | 12.3 mm × 8.8 mm | Nearly all modern phones with a SIM tray |
If you’re not sure which size you need, look at the tray after you open it, or check your phone’s manual or manufacturer support page. Today, most phones with a SIM tray use the nano size, the smallest one.
One rule matters here: press out only the size you need, and leave the rest of the card intact until you’re sure. If you pop out the wrong one, you can’t put it back, so check before you push.
What You’ll Need
- Your phone, with enough battery to finish setup
- Your Infimobile 3-in-1 SIM kit
- The SIM ejector tool that came with your phone, or a small, straight paperclip if you’ve lost it
- A clean, well-lit, flat surface (a tray or a soft cloth helps keep tiny parts from rolling away)
- The activation details printed on your SIM card or kit, which you’ll need to complete activation
Step-by-Step: Installing the SIM
- Power off your phone. Turning it off before you open the tray is a simple precaution that avoids glitches and makes it easier to see the phone recognize the new SIM when you turn it back on.
- Find the SIM tray. On most phones, it’s a small slot on the side or top edge with a tiny pinhole beside it. On iPhones that have a tray, Apple notes that the location varies by model, so check the side edges. On many Android phones, it’s on the side or top edge.
- Eject the tray. Insert the ejector tool or straightened paperclip into the pinhole, and press in firmly and straight, not at an angle. The tray should pop out slightly. Don’t force it. If it doesn’t release, check that you’re in the right hole and pressing straight.
- Pull the tray out gently. Slide it out with your fingers, keeping it level so the SIM or any other card in the tray doesn’t fall out. Set it on a flat surface.
- Press out the right SIM size. From your 3-in-1 kit, gently press out the nano, micro, or standard SIM that matches your tray’s cutout. Apply light, even pressure. If the edges feel sharp or uneven, don’t force the card into the tray. Check that you’ve punched out the correct size.
- Place the SIM in the tray. Match the card to the shape of the cutout, paying attention to the angled corner, or notch, that lets the SIM fit only one way. Infimobile’s help center notes that the card goes in with the logo facing up, which puts the gold contacts facing down. Let the tray’s outline and notch be your final guide, since the arrangement can vary by phone. The SIM should sit flat with no gap and no pressure.
- Reinsert the tray straight and fully. Slide it back in with the same orientation it came out in, and push until it’s flush with the phone’s body. A fully seated tray also helps keep water resistance intact on phones that have it.
- Power on your phone. Wait a minute or two. You may see a carrier name or signal bars appear.
- Finish activation and test. Complete Infimobile’s activation steps if you haven’t already (see below), then restart your phone if needed. Make a test call, send a test text, and check that mobile data works.
How to Avoid Damaging Your Phone
Most SIM-related damage comes from a handful of avoidable habits:
- Don’t force the tray. If it won’t open or close, stop and recheck the position and angle. Forcing it can bend the tray or damage the slot.
- Use the right tool. The ejector tool that came with your phone is shaped to fit. If you use a paperclip, straighten it fully and make sure the tip is smooth and intact. Don’t use a needle, safety pin, or anything with a broken or very sharp tip.
- Use only the tray that came with your phone. Apple specifically advises using only the SIM tray that came with your device, since trays from other models may not fit.
- Don’t cut the SIM with scissors. The 3-in-1 card is designed to be pressed out. Cutting can leave rough edges that jam in the tray or scratch the contacts.
- Avoid stacking adapters. Putting a smaller SIM in an adapter and sliding it into a larger slot can jam inside the phone.
- Keep the gold contacts clean. Avoid touching them, and don’t cover them with tape or stickers. If they look dusty, wipe gently with a clean, dry, lint-free cloth.
- Don’t bend the card or tray. Even a slight warp can cause a poor connection.
- Avoid dust and moisture. Don’t open the tray in wet conditions or with damp hands, and don’t leave the slot open longer than necessary.
- Don’t poke around if something falls inside. If a piece of a SIM or a tool tip gets stuck in the slot, stop and take the phone to a repair professional rather than digging at it.
Notes for iPhone and Android
iPhone (models with a tray). Power off, then use the ejector tool to open the tray, place the nano-SIM so the notched corner matches the tray, and slide it back in. If your iPhone doesn’t have a tray, it’s eSIM-only, and a physical SIM won’t work.
Samsung, Google Pixel, and other Android phones. Infimobile’s Android guidance is straightforward: power off your phone, use the ejector tool or a straightened paperclip to open the SIM tray, and insert the appropriately sized card from the 3-in-1 kit. Some Android phones use a hybrid tray with two cutouts, one for the SIM and another for a second SIM or a microSD card. Check the tray’s markings or your manual to be sure you’re placing the SIM in the correct cutout.
Older phones. A few older models have the SIM under the back cover or battery. Check the manual for your model and remove the cover gently without prying at the edges.
Devices that aren’t supported. Infimobile currently doesn’t support SIM-enabled smartwatches, iPads, or standalone routers, so installing the SIM in one of those won’t work even if the card physically fits.
Activating Your Infimobile SIM
Inserting the card is only half the job. The line also has to be activated. According to Infimobile’s help center, you can activate in two ways:
- On the website. Go to infimobile.com, choose Activate from the menu, enter the 8-digit activation code printed on the SIM card, and enter the last 10 digits of the SIM’s ICCID number, which begins with 8914800000. Then follow the on-screen steps.
- In the Infimobile mobile app. Open the Activation section and enter the same activation code and ICCID digits.
After activation, you’ll receive a confirmation email and a text message with your assigned phone number. Follow the order of steps printed on your kit, since some instructions have you activate first and others have you insert the SIM first. Either way, both steps need to be complete.
Keeping your existing number. During activation, you can choose a new number or transfer your current one. If you’re porting, you’ll fill out a port-in form with your current carrier details, and Infimobile’s support page notes that activation typically takes 2 to 48 hours depending on your existing carrier. Keep your old line active until the port finishes so you don’t lose the number.
Troubleshooting Common Problems
“No SIM” or “Invalid SIM.” Power off, remove the tray, check that the SIM is the right size and correctly oriented, reseat it, and power back on. If the message persists, wipe the gold contacts gently with a dry cloth and try again.
No signal after installing. Confirm activation is complete, then restart the phone and toggle airplane mode on and off. If you’re porting a number, service may not switch over until the transfer finishes, which can take up to 48 hours.
The phone says it’s locked or the SIM isn’t supported. A phone locked to another carrier won’t accept a new carrier’s SIM. Contact your previous carrier about unlocking it, and confirm your device is compatible.
The tray won’t open. Make sure you’re pressing the ejector tool straight into the correct pinhole, with steady pressure. If it still won’t budge, don’t pry. Try a proper ejector tool, and if needed, visit a repair shop rather than risk damage.
The SIM won’t fit. You may have pressed out the wrong size. Compare the card to the tray cutout, and don’t force it. If you’ve already punched out the wrong size, contact Infimobile support about a replacement kit.
Calls work, but data doesn’t. Restart the phone, confirm mobile data is turned on, and check that your plan’s data hasn’t run out. If the problem continues, contact support.
If you’ve tried these steps and still have trouble, Infimobile’s support team is reachable at +1 (855) 484-1855 or +1 (678) 608-1414, or by email at support@infimobile.com.
Physical SIM or eSIM?
Infimobile supports both a physical SIM and an eSIM. An eSIM is a digital SIM built into your phone, activated with a QR code sent by email after you buy a plan. It means no card, no tray, and no waiting for shipping.
A physical SIM makes sense if your phone doesn’t support eSIM, if you like having a card you can move between phones, or if you simply prefer the traditional route. An eSIM is the better choice if your phone supports it and you want to get connected right away, and it’s the only option for iPhones with no tray. To check, look for an Add eSIM or Add Cellular Plan option in your phone’s cellular settings, or use the compatibility checker.
Frequently Asked Questions
It’s not strictly required on every phone, but powering off first is the safest habit. It avoids glitches and gives your phone a clean start when it recognizes the new card.
Most modern phones with a tray use a nano SIM, the smallest size. Infimobile’s 3-in-1 kit includes standard, micro, and nano sizes, so you can press out whichever fits your phone’s tray.
Yes, if you’ve lost the tool, a straightened paperclip with a smooth, intact tip usually works. Press it straight into the pinhole, and don’t use anything sharp, thin, or damaged. If the tray won’t release, stop rather than forcing it.
Apple states that iPhone 14 models and later purchased in the United States can only be activated with an eSIM, and some newer models have no tray. In that case, a physical SIM won’t work, and you should set up an eSIM instead.
Activating a new number is usually quick, and you’ll get a confirmation email and text. If you’re transferring an existing number, Infimobile’s support page says activation typically takes 2 to 48 hours depending on your current carrier, so keep your old line active until the port completes.
Installing a SIM card safely comes down to three habits: check your phone first, go slowly with the tray, and finish activation properly. If you’re ready to get started, check your phone’s compatibility at infimobile.com/compatible and see current plans at infimobile.com/plans.